
Earlier this week, the EatSt. blog from Foodnetwork Canada posted an article I wrote about food photography tips. Since I have never written a blog post about taking food photos on the Droolius site, I thought I would re-share the photography post and add an extra section specifically to this blog post. The tips here are for when you are out dining at a restaurant, at a food truck or food cart, or eating any where indoors or outside. Later, I added a BONUS section, where there’s a few tips on how to make your food photos pop by editing and then where to share food photos…
Eat St. is a t.v. show that features food trucks/carts in North America
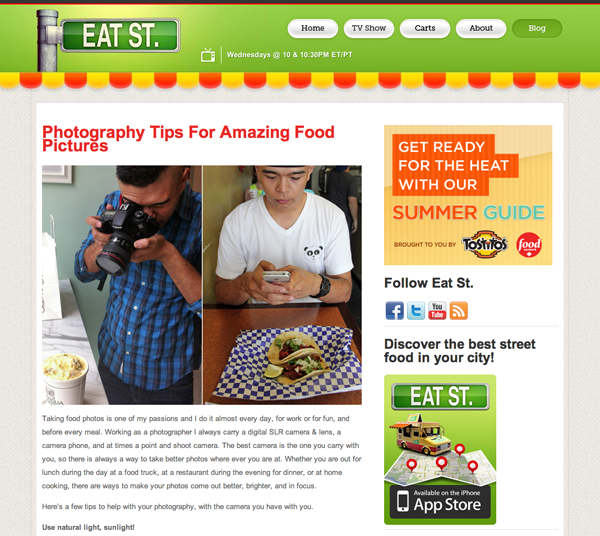
Photography Tips For Amazing Food Pictures
Taking food photos is one of my passions and I do it almost every day, for work or for fun, and before every meal. Working as a photographer I always carry a digital SLR camera & lens, a camera phone, and at times a point and shoot camera. The best camera is the one you carry with you, so there is always a way to take better photos where ever you are at. Whether you are out for lunch during the day at a food truck, at a restaurant during the evening for dinner, or at home cooking, there are ways to make your photos come out better, brighter, and in focus.
Here’s a few tips to help with your photography, with the camera you have with you.
Use natural light, sunlight!
The best lighting for photos is natural sun light. While you do not have to shoot outside while eating, a great light source while dining indoors is to sit near a window and use the available light coming inside. Also try going out for an earlier dinner if you go specifically to take food photos. At a food truck before the sun sets is good lighting to capture your food photos.
– If you like taking photos of your food inside restaurants, ask to be seated near a window so you have enough light to take a photo. You can position your food to your preference and you have enough light to take a great photo.
– Avoid using the on camera flash! On any camera (SLR, point & shoot, camera phone) the on board flash will tend to blow out the photo, create harsh shadows, photos will be too bright and loose important details. Plus you want to respect other diners while they are having their meal.
Focus on the food.
Auto focus on cameras tend to use the highlights on a subject and will focus at those points. To avoid your food being out of focus or the wrong detail featured on the dish, try picking the part of the subject you want to showcase. When you select the point of focus, then the camera will adjust the shutter speed to capture from that point and your photo will clearly focus where you want it to.
• Touch screen camera phone – select focus point by tapping on the area of food you want in focus, the camera will do the rest. Sometimes it will take a few tries to focus, but be patient and hold still until it is done focusing.
• Point & shoot – for up close food shots, use the macro mode, hold the shutter button halfway and let the camera focus on the food.
• SLR camera – pick a focus point (I use the center focus point) and direct what area of the food you want to focus on. Press the shutter half way to focus, and then recompose the frame. The camera will stay in focus at that point as long as you have the shutter pressed half way. After you have your desired composition of the dish, click the shutter all the way down to capture the shot.
• With any camera you use, take a few shots, change the angle, and always pick your focus point. Sometimes you want the front of the food to be in focus and at times you may want the center of a dish to be in focus. Many ways to be creative by picking your focus on the plate or on the food itself.
Shooting in the bright outdoors
Day light is the best light, but sometimes too much light can make a great looking dish turn into a bad photo with harsh shadows. The sunlight here in Florida can be very intense and at times it can be too bright. There are ways to help control the light.
• Bring the food into the shade & set your focus point on the food. Make sure that the camera will not focus on a bright sunlit background (if there is one). By selecting the focus on food in a shaded area out of the sun, the background will become fairly bright but your focus stays on the food.
• Using a white piece of paper or cloth (held over the food) can diffuse harsh bright sun light, and help control the amount of light beaming down on the food. This can create shadows itself, so keep in mind if you are trying to do this and avoid capturing the shadows from the light diffuser (paper or cloth).
Shooting indoors or at night (and avoiding blurry photos)
When shooting indoors, of course use natural light near a window if possible. If you are indoors and can only use available restaurant lighting, that is fine too. Just consider the amount of light you have and adjust accordingly. There are ways to make your photos look great with just using restaurant lighting, during the day or at night. Have blurry shots of food? Can’t figure why there is camera shake and you just want clear food photos? Here’s what you can do…
*Avoid using the flash! This goes back to what I mentioned in the beginning, it just looks unflattering 99% of the time. The best tip I can give is to shoot without the flash and learn how to adjust to your environment.
• Use your body for stabilization!
– Hold the camera in your hands and close to your chest, you can still focus and see your subject if you are looking down at a camera phone or point and shoot camera. This will help avoid the camera shake by providing a more stable way to hold your camera without your arms moving around in a dim lighted area.
– Plant your elbows on the table, they will act like legs on a tripod. This will stabilize your arms from moving and you can actually avoid the camera shake that causes a blurry photo from arms and hands moving.
• Use the edge of a glass as a tripod. Set you camera on top of the cup or glass on the rim, and adjust the angle to your subject. This is a way to get clear photos at night especially when there is not much light inside a restaurant.
• Lean the camera against a wall, a tree, or even a food truck. This will stabilize the camera and you can get a great clear shot of the food, as long as your hands can carefully press the shutter button with shaking the camera.
• Turn up the ISO on the camera. (moderate to advanced technique) Without getting technical, this allows your SLR camera or Point & shoot to accept more available light in taking the photo. The draw back though is the higher ISO, the more possibility for digital noise. Newer cameras have improved with high ISO capabilities and limiting the digital noise. Consult your owner’s manual or do some research online to see how high you can set it without compromising the results. On my Canon 60D with Canon 17-40L F4 lens, I am comfortable using an aperture of F4 and starting at ISO 1600 to 3200 when shooting indoors or at night outdoors with minimal light. Anything higher will result in digital noise in your photo.
When it is “ok” to use a flash
Some times there no choice and you are in the dark, so you HAVE to use flash.
• I still avoid using my on board camera flash and I use a phone’s flashlight app to light my food. I do this when I’m at dinner with my friend’s and sometimes have a few people help light the food with their flashlight app. This is a way to light the food from the side and avoid the harsh on camera flash. Try to have the lighting source off to the side. At times I do this on my own, hold the phone in my left hand while using the flashlight app to light the food, and have my SLR camera in my right hand focusing on the food and firing off multiple shots so I can hopefully capture one clear photo.
• At times I may use an external flash on an SLR camera, but I rarely do or depend on it. If you decide to use a hot shoe flash, try to angle the flash upwards and use a diffuser to soften the light and shadows that can over power a food photo. Also give some distance between the flash and your subject, allowing space to focus and a providing a more overall light above the plate of food.
So those are my basic tips to photographing food on the go, during the day or evening, indoors or outside. So much more can go into detail, but adjusting to your environment and practicing will always improve your shot. Maybe in the future I can go a little more in-depth with each of these tips and do a how-to step by step, but for now this gives you all a few things to practice.
Hit us back with some comments if you find any of these tips to help you in your food photos…

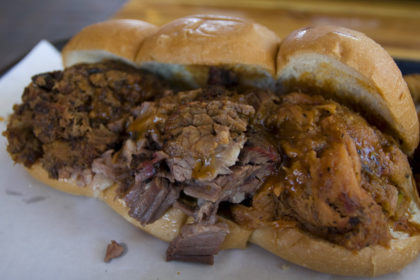
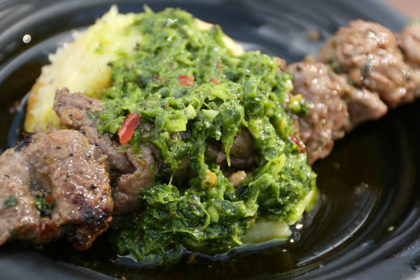
photo taken by fellow Foodspotting Ambassador Meng (click image to enlarge)
BONUS+
Make your food photos pop with a little photo editing
With any food photo I take, there is some way to make it pop a little bit more. Depending on what you take the photo with (iPhone, point and shoot, Digital SLR) there are several programs out there to make a photo a little better. I admit I can never leave a photo alone and post it unedited. Even if it looks near perfect (which never happens) there’s something that can be done to make it more appealing. The following programs and apps are what I use to edit photos, but there are many out there you can try.
• Photoshop (the basic process, nothing in depth)
For photos taken with a normal point and shoot camera or a digital SLR, I usually start by adjusting the Levels and making sure they are even. Then you can bring out details in the mid range with Shadow/Highlights menu. Next, I will adjust Hue/Saturation to bump up the color a little. Last, I will run a Smart Sharpen according to the file.
• Snapseed (iPhone photos)
For my iPhone food photos I like to use the Snapseed App. It gives you lots of editing options for any type of photography, but this is my process for editing iPhone pictures. First I select Tune Image menu and adjust the Brightness, increase Ambiance to bring out some details and color, adjust the Contrast if needed, increase the Saturation from +1 to +5 (do not oversaturate colors), and ocassionally adjust white balance if needed. Select next to apply the changes. Next, I Sharpen the details just a tad, normally not pass +5, to give some clarity to photo. Sometimes if I find it necessary, I will Crop the photo to my taste. Last step is to Save to Photo Library. Then I export the photo to various social media outlets. Snapseed is not a free app, but definitely worth paying a few dollars. I really do not buy that many apps at all, but I do recommend this one. It is currently available for iPhone, with Android platform coming soon.
What to do with your awesome food photos?
The typical thing to do is to post your food photos on Facebook, Twitter or Instagram so that all of your friends can drool over the great looking food you eat. Some people will blog about it and put it on their Tumblr, or add it to Yelp or Foursquare accounts. After that, how can anyone from around the world find your amazing food photos of that specific dish at that great restaurant? Isn’t it our duty to share the best places to eat as we share our food photos? Here’s where you can share food photos so others can find them…
• Foodspotting website/App
My favorite way to share my food photos (besides this blog) is Foodspotting, where I not only share food photos, but where to find that amazing dish that I ate. I originally used Foodspotting as a way to upload to Facebook and Twitter, but now I actively participate in the online food community and you can see food from around the world. Also when traveling to a different city or a different part of where I live, I just browse through other people’s photos to find places to eat or search for a specific dish in that area. Upload your phone photos to the Foodspotting App or share your point and shoot or Digital SLR photos on the Foodspotting website. Either way, it’s helping people find great food in different cities and in turn helps you find great food through photos.
• EatSt. App
If you are in to food trucks and food carts, then the EatSt. App now has a way to share your food photos to the according food truck or food cart. The app helps you locate the food trucks and you can see what dishes they serve as well.
That’s my process for taking food photos, editing, and sharing. Hope this helps you with your food photos and if you have any tips, suggestions, or feedback leave a comment below.
Words and photos by Julius Mayo Jr.
Content and photos © Droolius.com 2012


Thanks for the great tips! In a day or two I am going to take pictures for our menu at work… Ought to make the job easier 🙂
[…] * A photographer’s note – due to the low ambient light, I did use some light from a flashlight app on my iPhone. At least it wasn’t an on camera flash! More food photography tips here. […]
In food photography mostly important is to keep the natural look intact and for this good focusing and brightness is needed. I am fully agree with the fact that never take shots in night rather try to take shots in day light it then adds an extra freshness I guess so.
Nice tips. It will be effective for professionals. You describe all the important tips here. Thanks for your effort.
Really it helps people to learn something new. Nice Post.
Helpful article. I was beneficially for me. Thanks for your great Tips.